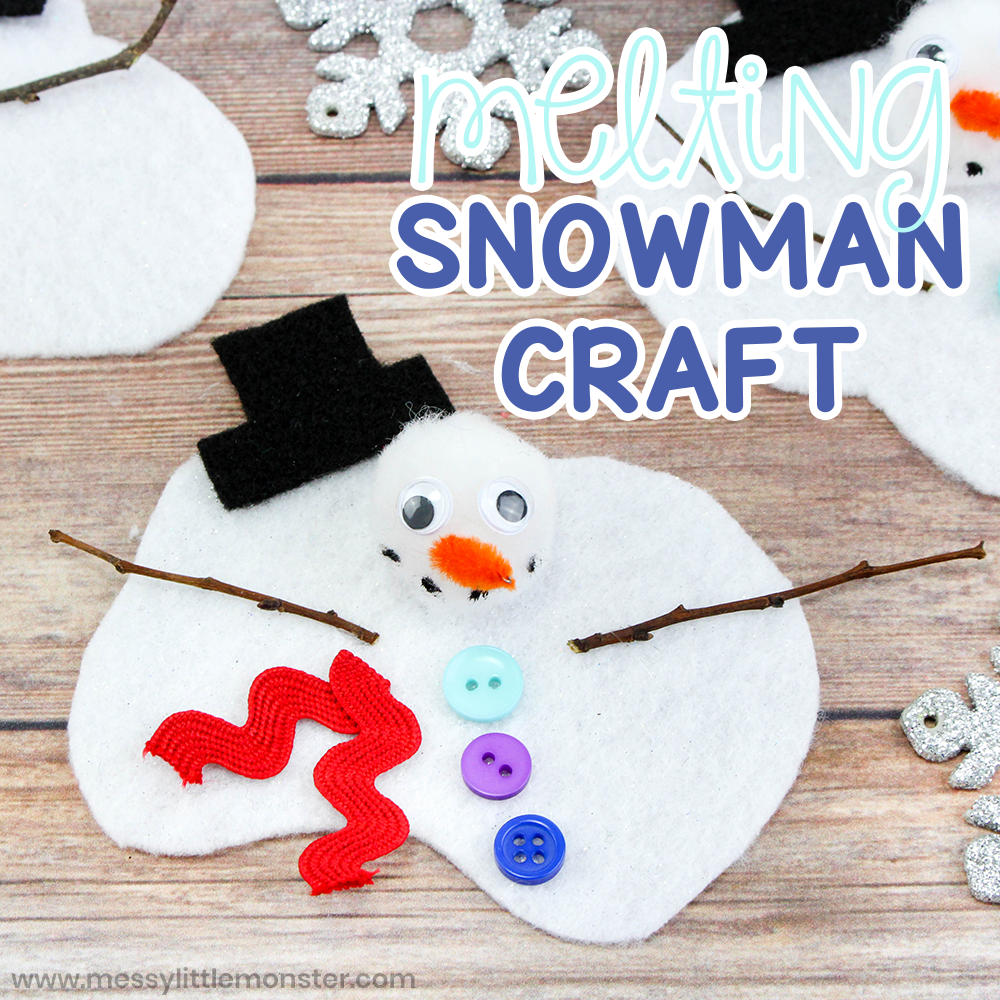
If you love this snowman craft, you'll love our puffy paint melted snowman craft complete with a melted snowman poem as well as these other snow and snowman activities! Check out our edible marshmallow snowman and cotton ball snowman too!
We love combining crafts with books. Take a look at our list of winter and snowman books to find a story to read to go along with this melting snowman craft.
Toddler and preschoolers as well as older children will have so much fun making this melting snowman craft! It would be so much fun to make after going on a winter walk and it provides lots of opportunities to talk about what happens when things melt and why things melt.
You might also like our melted chocolate snowman.
Scroll down below for full instructions to get started with your own melted snowman!
Related: Snow activities (that use real snow)
Follow us on Facebook, Pinterest, Twitter, Instagram, Youtube or Subscribe for free email updates!

Scroll down below for full instructions to get started with your own melted snowman!
Related: Snow activities (that use real snow)
Melting Snowman Craft
Melting snowman craft supplies
- Felt paper - black and white
- Pipe cleaner - orange
- Ribbon - red
- Googly eyes
- Pom poms - white
- Buttons
- Skinny tree branches
- Acrylic paint - black
- Paint brush
- Hot glue (or Elmer's school glue)
Directions to make melting snowman craft
STEP 1: Gather your supplies
Before you get started, gather up all the supplies needed for your melted snowman. This makes things easier when you have toddlers and preschoolers who have shorter attention spans.
It's much more fun to get them involved in preparing for the craft, so have them choose what buttons they want to use on their melting snowman craft. They might like to change the scarf and hat colour too! You could go out on a Winter walk to collect the tiny tree branches that you will need for your snowmans arms.
STEP 2: Prepare snowman faces
Now to get started, glue 2 eyes on 2 pom poms. Then, cut the orange pipe cleaner down into a couple of small pieces to represent the carrot nose and glue it on. Lastly, paint 4-5 black dots in the shape of a smile and allow it time to dry.
STEP 3: Prepare melting snow
Next, cut out an odd shaped wiggly circle from the white felt to represent the melting snow approximately 3-4 inches wide as shown below.
STEP 4: Glue snowmen onto melting snow
Once you've done that, cut top hats out of the black felt. Then, glue the head and hat towards the top of the white felt that represents the melting snow.
STEP 5: Finalize snowmen details
Now to finish up all the details on your melting snowman craft! Cut out 3-4 inches of ribbon, fold it in half, and then glue it at the top. Then, cut small arms off the tree branches and glue each to the melted snow as shown below.
Once you've done that, glue 3 buttons onto each snowman and you're finished! The great thing about this melting snowman craft is that they will all look different! There is no right or wrong way to do them, these instuctions are just a general guide. If your child wants to add eyes at the bottom of their snowman or buttons at the top, that totally works as it is a melted snowman!
We hope you have lots of fun making this melting snowman craft with your toddlers and preschoolers. They will love creating their very own melted snowman! For some added Winter fun, try pairing it with a fun winter or snowman book! Don't forget to check out some of our other fun snowman crafts too!
Follow us on Facebook, Pinterest, Twitter, Instagram, Youtube or Subscribe for free email updates!


No comments