In this adorable art activity, we are going to create farm animals using only ink pads or paint and your little one's thumbs (fingerprints work well too!)
My kids were fascinated with the cute little piggy and the dog, but the chick, horse, and frog were also a big hit at home!
Scroll down for full instructions on how to make thumbprint art for each of the farm animals. We also have Ocean Animal Thumbprint Art and Bug Thumbprint Art that you might like to take a look at.
Farm animal crafts are perfect for toddlers and preschoolers. Here are a few more farm animal crafts and activities that your little one might enjoy:
Scroll down for our thumbprint art printable
Thumbprint Animals
Thumbprint Art Supplies:
- Ink pads or paint
- Markers
- Paper
Follow the instructions for each of the farm animal thumbprints below.
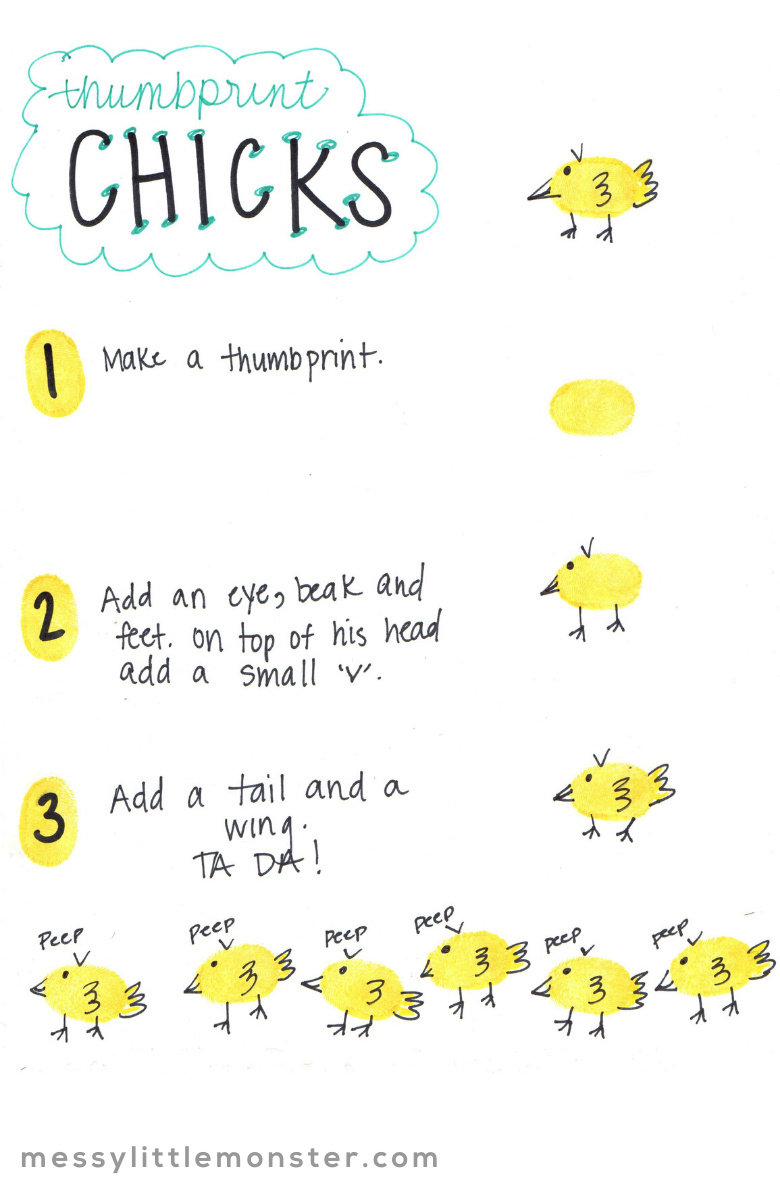
Chick Thumbprint Art:
- Start by inviting your kid to make a sideways thumbprint onto the paper you've chosen to use for this art project.
- Then, take an orange marker and draw a triangle shape on the end to create a beak.
- Taking a black marker, continue by drawing an eye and stick feet.
- After that add a little "V" on the top.
- To make sure you can tell it's a chick, make a squiggle shape with the paint to add the chick's wing.
- Don't forget to add a smile to the beak!
Dog Thumbprint Art:
- Create a sideways brown thumbprint with paint and take a brown marker to draw a large "U" shape. This will be your dog's ear.
- Continue by drawing two eyes, oval nose, mouth, and some cute freckles on the front and small tail on the end.
- Finish it off by adding brown legs and feet.
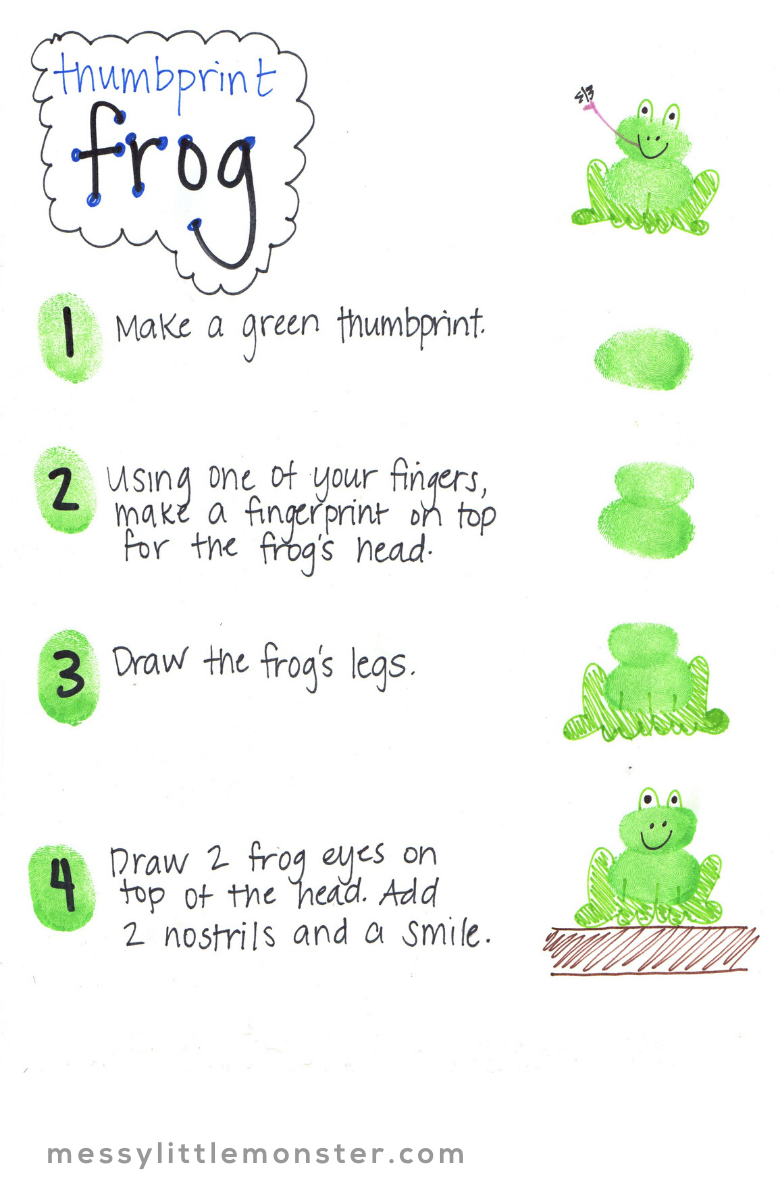
Frog Thumbprint Art:
- Start by making the frogs body. Just take green paint and make a sideways thumbprint and then create a horizontal fingerprint with a pointer fingerprint on the top of the green thumbprint.
- This is will be your frog’s head.
- Drawn a big hump on either side to make your frog's legs.
- Now, draw a line on the frog's belly.
- Complete the frog by adding some large feet with a marker.
- For the front feet, draw a couple of bumps for toes.
- Then, make two bumps, or upside down ‘U’s on top of the frog’s head. These will be the frog's eyes.
- Draw two eyeballs, a smile, and two nostrils.
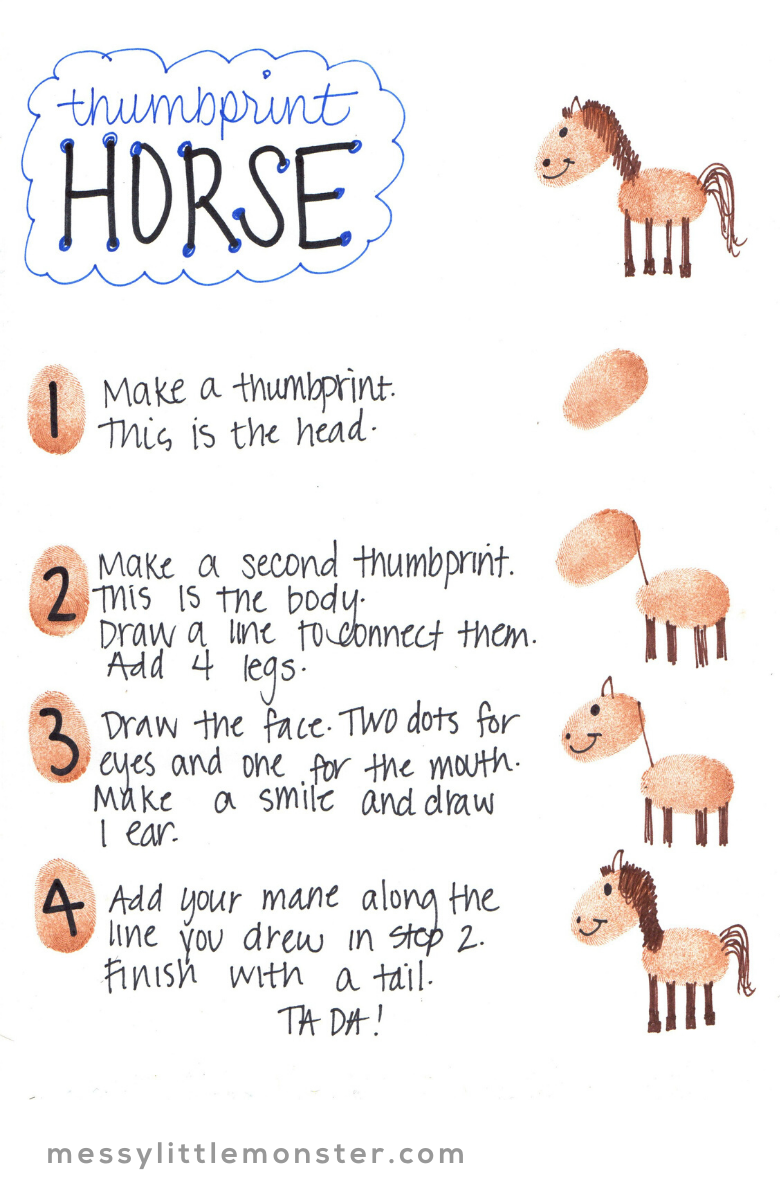
Horse Thumbprint Art:
- Start by creating the horse's body first. Simply make a horizontal brown thumbprint on your paper and another brown thumbprint but this time, at an angle. This is your horse's head.
- To connect the head to the body, simply draw a line and add an ear to the very top of the horse's head.
- Time for the mane by drawing it with your marker!
- Continue by drawing four long rectangles with a brown marker for the legs and add a tail to the end of the horse's body.
- Then, you just need to add the eyes, nostrils, and a little smile. You can also use grey o black to add four small squares at the end of the horse's feet and draw your hooves.
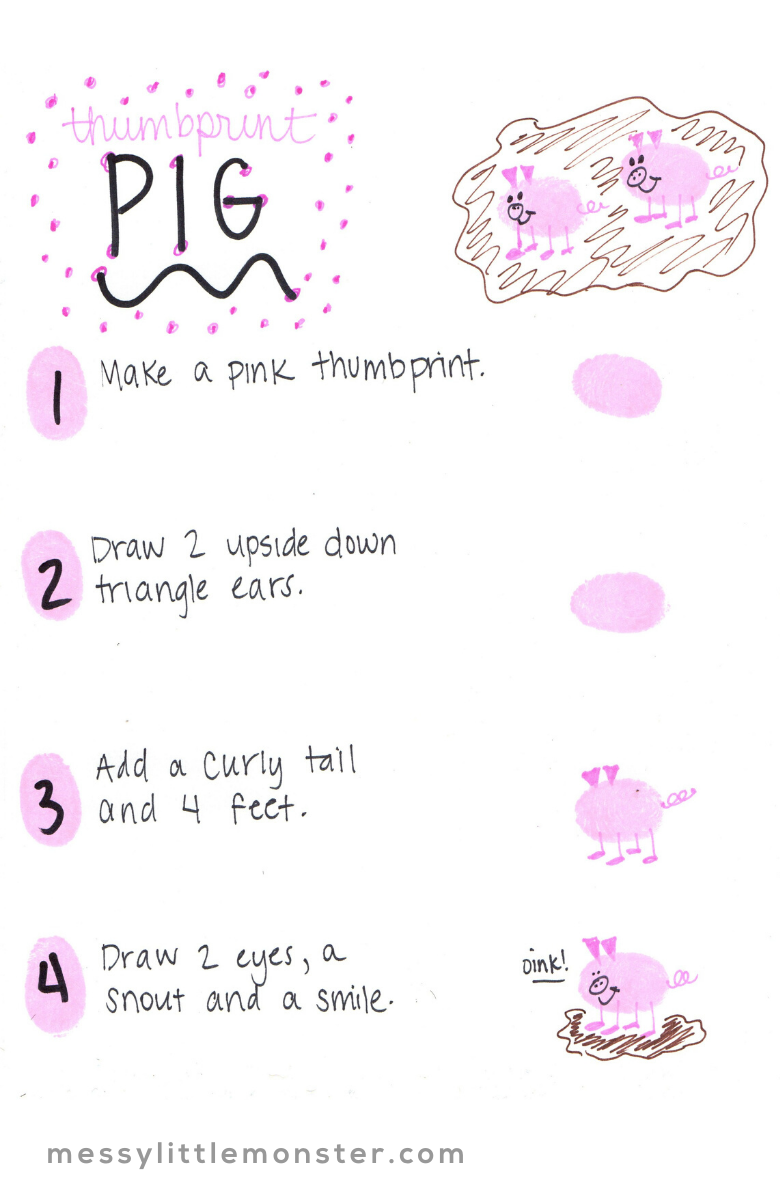
Pig Thumbprint Art:
- Taking the pink paint, make a sideway thumbprint.
- Add two ears on the pig by drawing two triangles on top of the thumbprint and then, add a circle for the nose.
- To create the cute nostrils, just make two dots inside the circle.
- For the legs, add four pink sticks and feet.
- Continue by adding the curly tail at the end and draw in two eyes and a smile!
If you want a printable copy of these farm animal thumbprints click on the link below.
DOWNLOAD YOUR THUMBPRINT ANIMAL PRINTABLES
To download these thumbprint animals click on the link below to be taken to the Messy Little Monster shop. For personal or classroom use only. Not for redistribution. All images are copyrighted. Thank you.
Making thumbprint art is such a perfect option for a fun afternoon. This art project is just perfect for any little ones interested in farm animals. A set of thumbprint animals would make a cute card for someone special. Endless options, endless fun!
Follow us on Facebook, Pinterest, Twitter, Instagram, Youtube or Subscribe for free email updates!


No comments