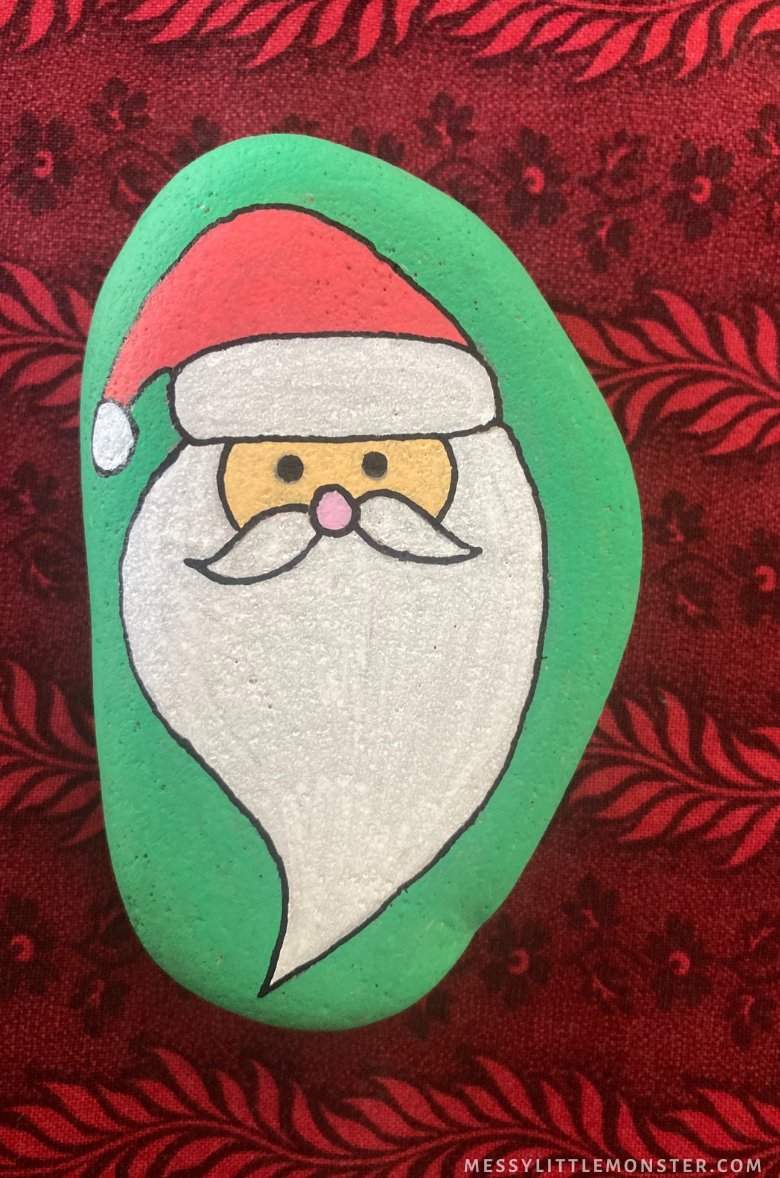
Put a spin on festive crafts with this marvellous Christmas Rock Painting art project!
You definitely need to have a few tricks up your sleeve when it comes to keeping the kids entertained during the holidays. And this Christmas rock painting craft guarantees just that!
Today we decided to take our crafting project outdoors and add a little something special to our day by making these festive rocks.
Easy to make and mess-free, this rock painting activity is a breeze to put together (and put away!)
Your little ones will have a blast painting different holiday-themed motifs on rocks and display them later as Christmas decorations or outdoors for others to find.
How to make painted rocks for Christmas
Christmas Rock Painting - Supplies:
- Rocks
- Pencil with eraser
- Acrylic paint and/or acrylic paint pens
- Paintbrushes
- Sealant
- Glue
- Any fun decor that you're gluing
Christmas Rock Painting - Instructions:
STEP 1: Gather your rocks and prep them.
First things, first! Go outside with your little ones and pick up some rocks, trying to find ones with flat surfaces.
If your home doesn't have access to a yard, don't worry! You can find rocks in parks; just make sure it's not a protected area. You can also go the online-route and buy on Amazon or even at a local garden centre.
Wash and dry your rocks to make sure they don't have any debris or dirt on them. This is essential as it will help your paint stick properly.
Another recommendation is to use the glue brand E6000 if you want to add any extra decorations to your rocks.
Remember you will need to seal your design first with a sealant layer before gluing anything on to the rocks.
STEP 2: Start drawing on your rocks!
Invite your little ones to join you and encourage them to draw their designs on the rocks with a pencil. Use the rock painting ideas below as inspiration, but have fun coming up with your own designs too.
You may want to add a layer of white paint to your rocks before you begin your designs if your rocks are a darker colour.
STEP 3: Add colour to your rock painting designs.
Now it is time to paint your rocks. Take your time and get creative. Once you have finished painting and the paint has dried don't forget to seal your painted rocks.
Christmas Rock Painting Ideas
Christmas rock painting- Present
To make the present rock draw a square in the centre of your rock. Add some diagonal lines on the corner of your square and join them up to make your square look 3D. Then add extra lines for ribbon.
Using the colour of your choice paint the background.
Then choose two more colour, one for the present and one for the ribbon. Paint two large loops on the top of your present to make the bow and add two ties at the bottom of it. We decided to paint this part in a blue shade and use green for the box.
Once you are happy with your rock painting and the paint has dried outline all the details with a black marker, and as a final step, cover your rock with a layer of sealant spray to complete this rock art.
Christmas rock painting- Christmas Tree
To make the Christmas tree rock start by tracing a tree shape on the rock and add a trunk.
Colour the tree using green paint and use a brown shade for the trunk.
Once the tree is dry add a background colour to your rock. For this Christmas tree rock, we decided to paint a sky in a light blue colour with small white dots to represent snow for the background. We added the white dots after the blue paint had dried.
Have fun using paint or paint pens to decorate you Christmas tree. Add colourful decorations and a star. Feel free to add more decor, the more imaginative the better!
Once the paint has dried, use a black marker to outline all the small details you want to stand out! Spray with a sealant layer to complete the rock and this rock painting tree is complete.
Christmas rock painting- Santa
For the Santa rock painting use a pencil to outline Santa's beard, face, nose, moustache, and hat on your rock.
Using white paint, paint the beard and moustache and the hat's brim and snowball. Then paint the hat itself with red paint.
Using a skin colour of your choice, paint the face. Paint the nose and outline the details on Santa's face with black.
As a final detail, paint the background in a contrasting shade, we went with green.
Add your sealant spray and your Santa rock painting is complete!
Christmas rock painting- Reindeer
For the reindeer rock use a pencil to draw an oval shape for the reindeer's head and then draw a small circle near the bottom of the oval for his snout area. Add facial features and some antlers.
Mix up several shades of brown to paint your reindeer. Use a lighter shade to paint the mouth and nose area, use a medium brown for the main face area and a darker brown for the antlers.
Paint the inside of the ears with a pink shade and the nose red. Outline all the details in black and finish it off with some sealant. Your Rudolf reindeer rock painting is now complete.
Your Christmas rocks are now ready to be played with or laid out as decorations. If you have sealed your rocks they can be used indoors or outdoors.
We hope you enjoy doing a little Christmas rock painting with your little ones and have tons of fun!
Follow us on
Facebook,
Pinterest,
Twitter,
Instagram,
Youtube or Subscribe for free email updates!


No comments