Celebrate love on Valentine's Day! These adorable Valentine's Painted Rocks are the perfect combo of outdoor fun and crafting creativity all wrapped into one.
We chose to celebrate Valentine's Day in the best way we know... by making crafts, of course! These Valentine's Day painted rocks are a mess-free and easy activity to encourage kids to go on a fun rock-hunting adventure and let their creativity run free after collecting their pebbles.
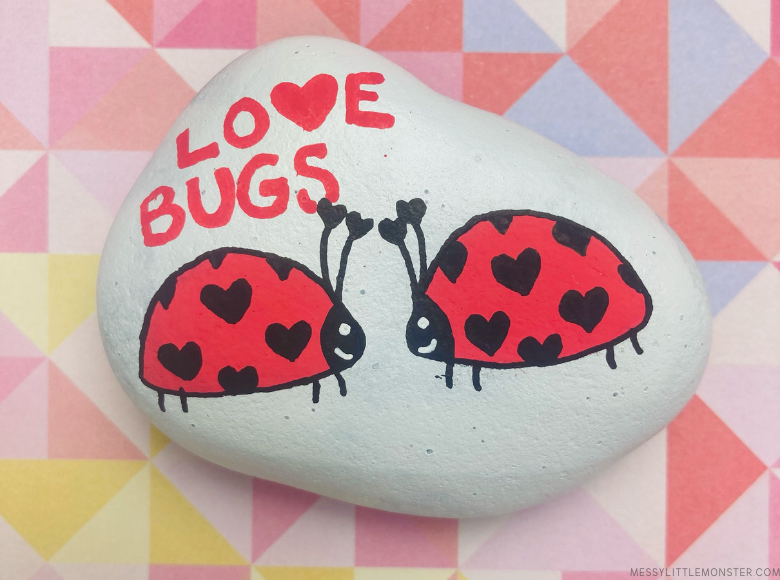
We've created our designs using cute little creatures from the garden as our main inspiration. Otters, birds, ladybugs and two adorable hearts are the main stars of this craft.
Along with the design, we've also added a few lovely and catchy phrases, which makes this craft the most endearing and unique Valentine's Day gift ever!
Want to learn how to make these Valentine painted rocks? Read on for the step-by-step instructions!
Valentine's Painted Rocks - Supplies:
- Rocks
- Pencil
- Acrylic Paint
- Acrylic Paint Pens
- Paintbrushes
- Sealant
Valentine's Painted Rocks - Instructions:
Below you will find step by step direction for four painted rock ideas with a Valentine theme.
Before starting your painted rock craft make sure your rocks are clean. If your rocks are dark in colour coat them with a layer or two of white acrylic paint before starting your designs.
We would recommend using acrylic paint and/or acrylic paint pens with a layer of sealer on top if you want your rocks to last outdoors. If you are keeping your rocks indoors any paint or pens will work for these rock crafts.
Painted Rocks: Ladybugs (or ladybirds!)
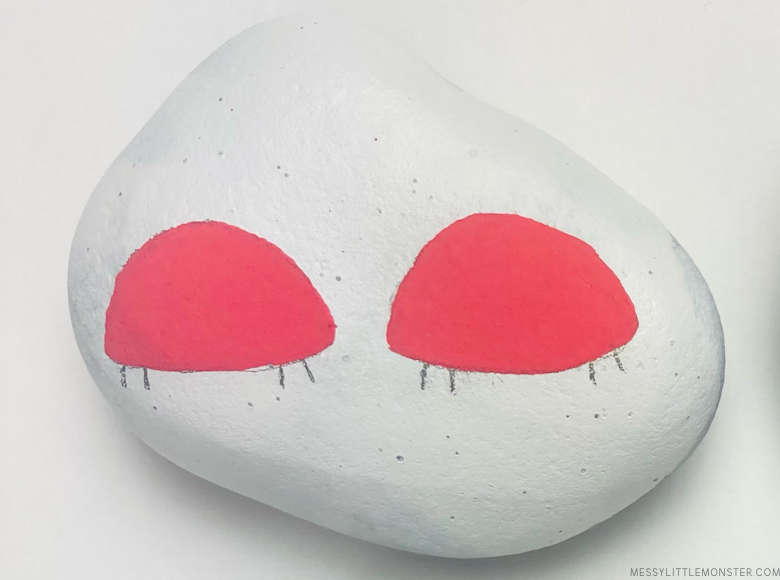
Start making your cute ladybug rocks by outlining the bugs' shape using a pencil. To help you out, try to get a similar shape to what a folded taco shell looks like!
Use the image below to get a clearer idea. Then, add the feet, both for the front and for the back.
Colour your ladybugs with red acrylic paint.
Then, take black paint or a black paint pen and add the head and a pair of antennae. Try making a little heart at the top of each antenna; it looks adorable!
Using a small paintbrush (or fine-point paint pens) add the little heart shaped spots. With a white marker or paint pen, add the eyes by drawing dots and add a cute smile.
If you want to, spray a layer of sealant to keep this rock craft safe from the elements (and the kids' rough playtime!)
Painted Rocks - Hearts:
Grab another washed rock and start by drawing two hearts next to each other with a pencil. Then draw legs, arms, and feet with your pencil. Make sure to connect the arms in the centre of the rock, so both hearts are holding hands.
Paint the hearts! We loved using red, but any shade of pink would work! (or mix it up a little and use your favourite shades)
Trace the arms, legs, and feet with a black paint pen.
Then, add some character to your painted rocks by giving each heart a different look! You can give them a smiley face, draw the eyes with simple dots, add eyelashes and even add pouty lips... it's all up to you (and the kids!)
MOM-TIP:
Always trace the face features with a pencil first and not straight with a marker. A lot more room for error!
Add a cute phrase related to hearts or love. We decided on "two hearts" on our rock. Apply a layer of sealant and let it dry.
Valentines Painted Rocks - The Lovebirds:
To start making your love birds' shape, make the "heads" by drawing the top of a heart with a pencil. Then, trace their beaks. Using your pencil, trace the branch where they're sitting, across the bottom of the rock.
Using your kids' favourite colors, colour each bird! We used dark blue and a lighter blue shade.
Continue by colouring the beak using a bright color. We picked yellow.
Then, outline the bird's shape with a black paint pen and add a thin line to make the eyes. Trace loop-shaped lines across the wings to mimic the feathers.
Apply some brown acrylic paint and colour the branch. For the leaves, use any shade of green you like.
Paint the bird's tail with the colours you previously chose for each bird.
To make these birds look even cuter and in love, you can add a little area of blue paint right in the middle of each bird and a few diagonal lines around it to make it look like they're holding each other.
To finish this love bird rock design, outline the branches and leaves with a black paint pen, write your love message and spray your new creation with sealant.
Painted Rocks - Significant Otters:
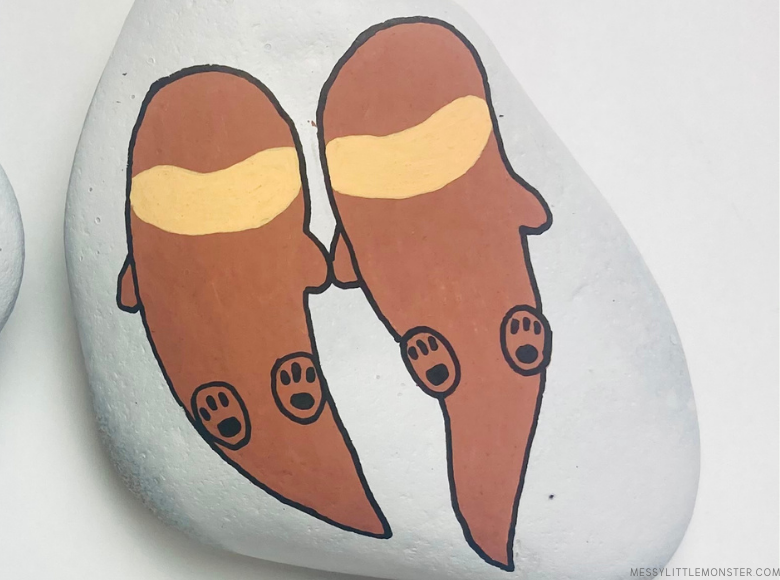
After you've cleaned your rock, draw two elongated ovals, tapered at the end. These oval shapes will be the otters and the tapered end will be their tail.
Add the arms, making sure to draw them in a way they touch right in the middle.
Colour in the otter's shapes with brown acrylic paint.
Using a lighter hue of brown, draw a shape similar to a jelly-bean across the bottom part of the otter's faces.
Pick up the black paint or a black paint pen and draw the feet. To make it more realistic, don't forget to add the pads of the feet.
Take the paint pen and outline every part of your otters. Then, you just need to add the eyes and noses!
Finish off your otter rock by adding a layer of sealant.
Aren't these rocks the cutest!? We hope you enjoy going on this rock-hunting game and making these adorable Valentine's painted rocks!
Follow us on
Facebook,
Pinterest,
Twitter,
Instagram,
Youtube or Subscribe for free email updates!


No comments