Looking for a fun life cycle of a butterfly project to create with your kids? You're going to love this butterfly life cycle craft made from a paper plate! It's such an easy craft to put together that kids are sure to love creating. Follow the step-by-step directions below to get started on your pasta butterfly life cycle craft.
Looking for more butterfly crafts? Be sure to check out this butterfly life cycle activity with tree seeds, these butterfly life cycle playdough mats, and these butterfly life cycle worksheets.
This butterfly life cycle craft is great for younger children as it is easy to make. Toddlers and preschoolers are at that fun age where they are fascinated by everything -- and the butterfly life cycle is no exception. They'll have so much fun learning about all the different stages with this butterfly life cycle craft.
This life cycle of a butterfly project pairs great with other books and resources discussing the different stages of a butterfly. You can read stories, purchase a butterfly kit, or include it in a lesson at home. Or maybe you're just nurturing your child's interest in bugs! Either way, it's sure to be a lot of fun.
Scroll down to learn how to make your very own life cycle of a butterfly craft.
Butterfly life cycle craft for kids
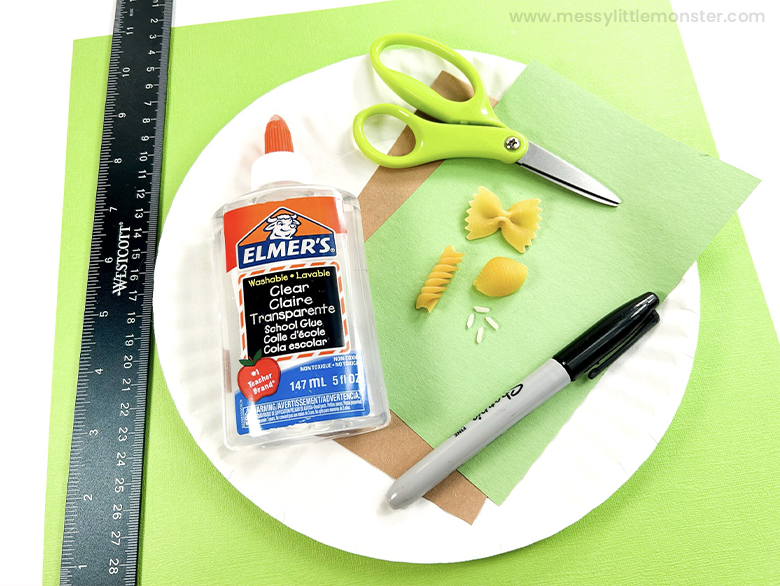
Pasta butterfly life cycle craft supplies:
- White paper plate
- Black marker
- Ruler
- Construction paper - green, brown, and blue
- Glue
- Scissors
- White rice
- Pasta - rotini, shell, and bow tie
How to make a life cycle of a butterfly project
STEP ONE: Gather up your supplies
Before you start making your butterfly life cycle craft, you'll want to gather up all your supplies. I find that crafts that involve lots of supplies are much easier when you prep them on the table beforehand.
STEP TWO: Divide each section
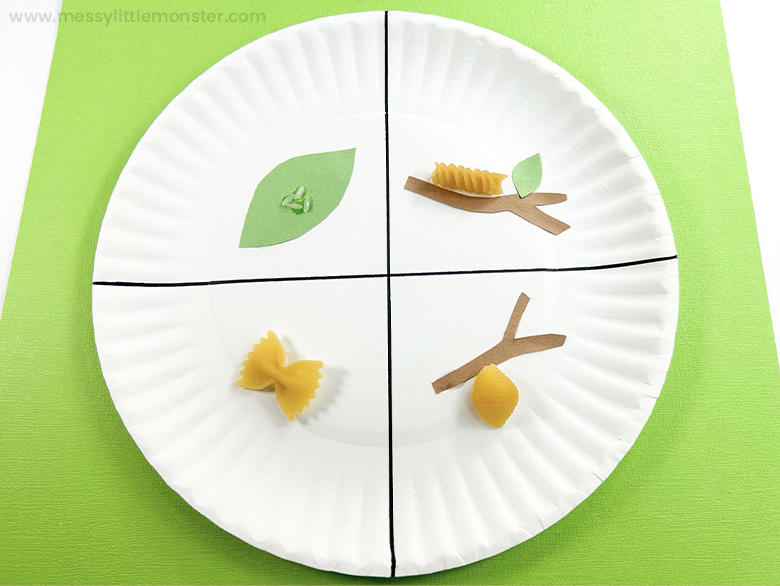
To start, you'll want to draw a line both horizontally and vertically across the paper plate using a ruler and black marker. You'll be left with four sections for each phase of the butterfly life cycle.
STEP THREE: Assemble each cycle
Start by cutting out a leaf shape from green construction paper and gluing it to the top left section of the paper plate. Glue several pieces of rice on top to represent the eggs.
Next, cut a branch out of the brown construction paper and a leaf shape from green construction paper. Glue in the top right section of the paper plate and then glue a rotini noodle on top of the branch to represent a caterpillar.
For the bottom right section, cut out and glue down another branch from brown construction paper. Glue a shell pasta on the branch to represent the chrysalis.
Finally, glue down the bow tie pasta to represent the butterfly in the bottom left section.
STEP FOUR: Label and finalize your butterfly life cycle craft
Next, label each section with a black marker as shown below. Then, cut a rectangle out of blue construction paper and write "life cycle of a butterfly" before gluing it to the centre of the paper plate.
To finish up your butterfly life cycle craft, draw arrows on the outer edges of the paper plate rotating clockwise. Your life cycle of a butterfly project is now complete!
This butterfly life cycle craft is such a fun way for toddlers and preschoolers to learn all about the life cycle of a butterfly! It's such a simple craft that pairs great with all kinds of books about butterflies. We hope you have fun with your life cycle of a butterfly project!


No comments