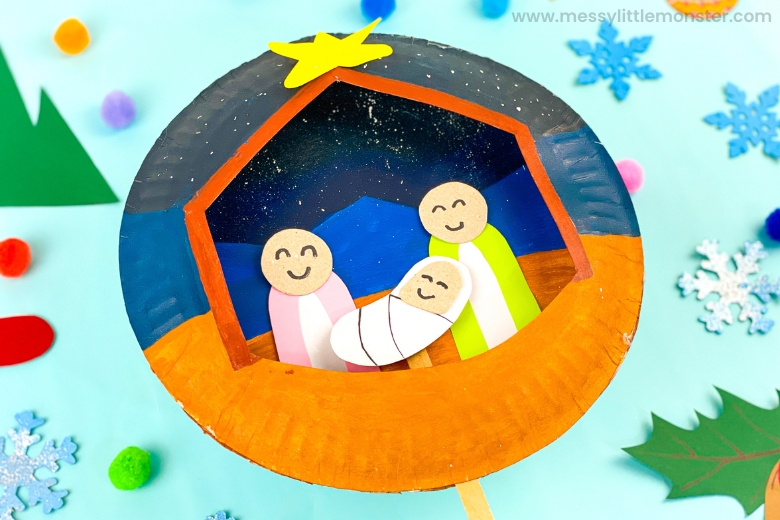
With the Christmas season sneaking up on us, what better time to do a nativity craft with your toddler or preschooler? Older kids are sure to love this nativity scene craft too. It takes a few simple supplies and is a great activity for the Christmas season and talking about the story of Jesus. We've even included a template to make this paper plate nativity craft super simple. Follow the step-by-step directions below to get started making your own nativity craft!
Looking for more nativity crafts for kids?
You'll love this printable 3D nativity scene, these nativity ornaments, this Jesus in a manger craft, these nativity colouring pages, and this nativity handprint craft.
We also have a set of nativity puppets to make and play with and a Christmas nativity scene printable to make your own DIY nativity scene.
Christmas is such a fun time of year for so many reasons, but the Christmas crafts are definitely one of the top reasons! Kids of all ages are sure to get into the spirit of Christmas with engaging crafts. This paper plate nativity craft is brilliant for discussing the story of baby Jesus.
This nativity scene craft has to be one of our favorites that we have done so far. If you're looking for a craft to discuss the true meaning of Christmas, you'll certainly want to check out this moving nativity craft for kids. It would be a great nativity craft for church groups, too. if you are short on time you could always colour your paper plate nativity scene instead of painting it.
Don't forget to scroll down and print out the free template to make this nativity craft super easy!
Scroll down below to get started on your very own nativity scene craft!
Nativity Craft for Kids
Nativity craft supplies:
- nativity craft template
- 2 paper plates
- craft stick
- paint - black, blue, yellow, brown, white
- paint brush
- cardboard
- construction paper - yellow, pink, light green
- double sided tape
- pencil
- marker
How to make a nativity scene craft
STEP ONE: Gather your supplies
Before you get started on your paper plate nativity craft, you'll want to make sure you have all your supplies ready. If you haven't got a copy of the template yet, make sure you scroll to the end of the directions to get a copy printed to make assembling the craft easier.
STEP TWO: Paint the background
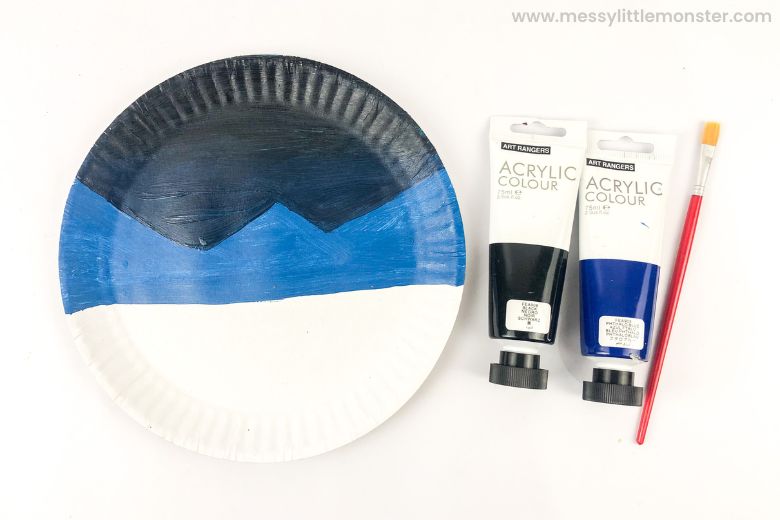
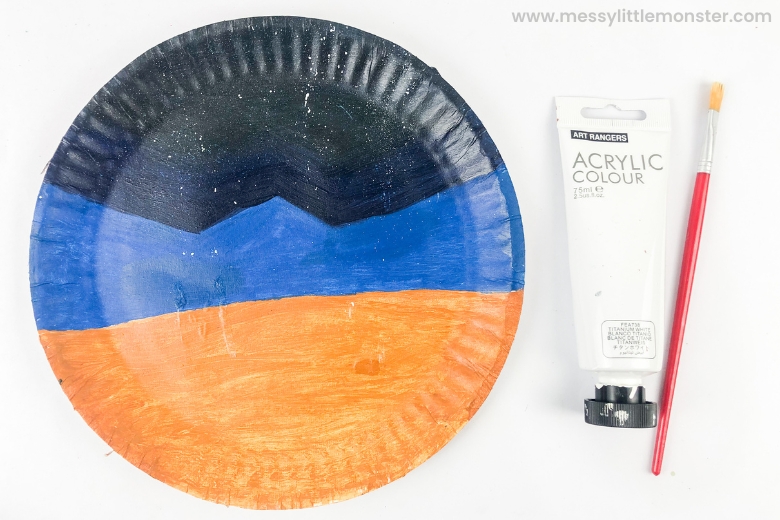
To get started, you're going to paint the nativity scene background on the front side of the first paper plate. Start by painting the sky at the top in black paint. Let it dry before moving on.
Next, paint the mountains with blue paint up to the middle of the paper plate, as shown below. Let it dry.
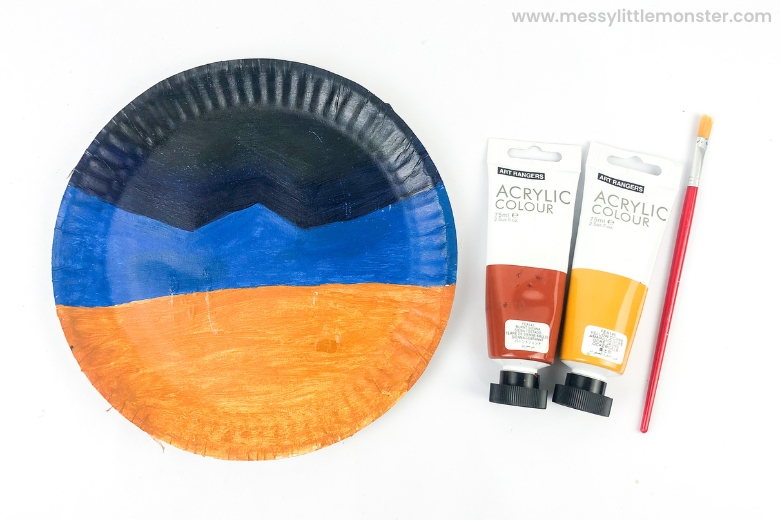
Then, mix a small amount of brown paint with the yellow. Paint the remaining portion of the paper plate with that colour and let it dry.
To finish up, add stars to the sky with white paint. To achieve the look below, dip your brush in white paint and then hold it above the paper plate while tapping it on your hand to create a paint splatter.
STEP THREE: Prepare the stable
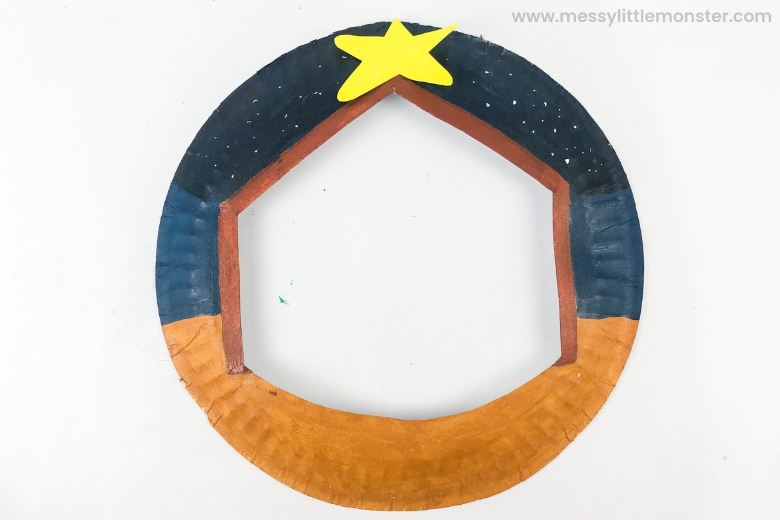
Time to prepare the stable! Grab the other paper plate and cut a house shape out of the center as shown below.
Next, line it up with the first paper plate and paint it in the same background design. You'll want it to line up as closely as possible to achieve the desired result. Let it dry before painting the inside of the plate with brown paint to resemble the trim on the stable.
STEP FOUR: Prepare the nativity family
Now to make the family for your nativity scene craft! Trace the template onto the corresponding coloured paper. Trace the star on yellow paper, an arch shape on green paper, another arch shape on pink paper, and the remaining shapes on cardboard.
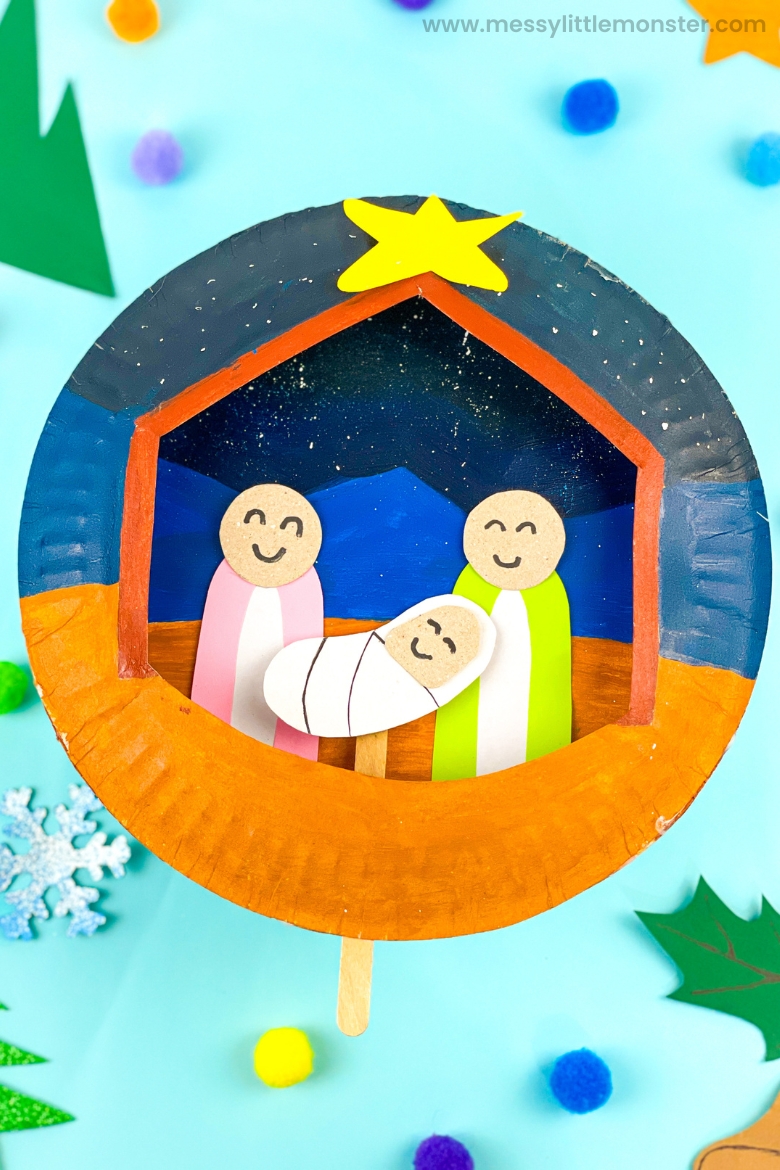
After you have all your shapes cut out for your paper plate nativity craft, cut them all out and add the face details with a black marker. Glue the pieces together as shown below for Mary, Joesph, and baby Jesus.
STEP FIVE: Assemble & complete the nativity scene
To finish up the nativity craft, you'll need to glue the star at the top of the paper plate with the stable shape cut out.
Next glue baby Jesus to a popsicle stick.
Then glue Mary and Joesph to the background paper plate towards the bottom.
Finish up the nativity scene craft by gluing the paper plates together with a glue stick, making sure to leave a small space towards the bottom to insert the popsicle stick baby Jesus in between Mary and Joesph.
You're all done with the paper plate nativity craft! If you move the popsicle stick baby Jesus can move between Mary and Joseph.
GET YOUR NATIVITY SCENE TEMPLATE BELOW
To grab this nativity template for free click on the link below and use the discount code: nativity. For personal or classroom use only. Not for redistribution. All images are copyrighted. Thank you.
We hope you have lots of fun making this starry night nativity scene craft from paper plates. It's a great chance to get into the spirit of Christmas and discuss the story of baby Jesus. This is the perfect nativity craft for kids this time of year.






.png)


No comments